
last updated: 10/0918 at 8:45 am
Room 110 (Active Learning Classroom)
Audio: a wireless lapel mic and a wireless hand-held mic are in the mailroom down the hall. Please return them to the charger when you are done.
Video (wireless):
-
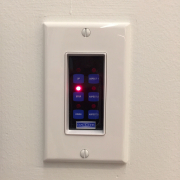
Turn on the projector and lower the screen using the touch screen on the West or East wall.
-
If you want to project to both screens you can do so from either touch screen. This screen becomes your only control.
-
Under "Video Source" touch "Wifi."
-
Change the wifi network you are on to “Projection_110.” The password is "ontogeny" (no quotes).
-
Follow the onscreen instructions.
Video (wired):
- Turn on the projector and lower the screen using the video touchscreen on the West or East wall.
- Under "Video Source" touch "HDMI."
- Plug in an HDMI cable (stored in the mailroom) into the wall below and to the side of the video touchscreen.
- Please shut down the projector when you are done unless another class is arriving as you finish.
- Please return the HDMI cable to the mailroom unless someone will use it right after you.
Rooms 105, 111, 113 and 119 (labs)
Wireless:
- Once only: get MirrorOp by looking under “Sender Software” on the left, click on the type of device you have (Mac, Windows, etc.), download it and install it on your computer or mobile device.
- Turn on the projector with the remote control on the A/V cart.
- Lower the screen using the controls on the wall. Press hard with the tip of your finger or fingernail - it's stiff.
- Change the wifi network you are on to “Projection_105” (or _111, _113, _119). Please email Dave Hurley (dhurl at uw) for the password.
Wired:
- On the A/V cart, plug the HDMI or VGA cable into your computer.
- Using the remote, turn on the projector. It should auto-detect the HDMI source. If it does not, open the front of the cart and press Input 4 on the media switcher at the bottom of the rack.
- Lower the screen using the Down button on the wall control. Press firmly using just the tip of your finger. If the contact surface is too large the button will not be pressed.
- NOTE: the cart in room 113 is not operational yet.
Conference rooms
- Wake up the display by pressing the green Power button on the remote.
- Use the remote to set the input to HDMI.
- Plug in the HDMI cable in the wall plate below and to the left of the display.
- Plug in the HDMI cable to your computer.